
Table of Contents
How to Install WAC Track Lighting in Your Marina del Rey Home
Installing WAC track lighting in a Marina del Rey home provides flexible, adjustable illumination that adapts to coastal living spaces. WAC track systems allow homeowners to reconfigure fixtures as needs change, making them ideal for open layouts and rooms with high ceilings common in the area.
Coastal environments require marine-grade fixtures to resist salt air and humidity, and California’s Title 24 Energy Code requires modern LED fixtures for new installations. There are some additional steps that go above basic installation requirements, such as load calculation and securing permits, both of which can be handled easily by a licensed C-10 contractor. A standard room retrofit typically takes between two and four hours of labor time, but the permit process usually adds about one to two weeks onto that time frame.
It takes you through the steps, from planning all the way down to final code and installation checks, to ensure a smooth, compliant upgrade tailored to a Marina del Rey home.
Key Takeaways
- A successful installing WAC track lighting project in Marina del Rey begins with preparation.
- Installing WAC track lighting in a Marina del Rey home begins with a carefully planned track layout.
- When installing track lighting in Marina del Rey, position the track against the ceiling mount and press down until it locks in place.
- For installing WAC track lighting in Marina del Rey homes, the wiring connection must be done carefully, paying attention to safety and code requirements.
- Next, once everything is wired up, lay out the rail in straight lines, matching the conductor wires as closely together as you can at each joint.
Before You Begin: Tools, Codes, and Safety Checks
A successful installing WAC track lighting project in Marina del Rey begins with preparation. Gather the essential tools and review the critical code and safety requirements before touching the ceiling.
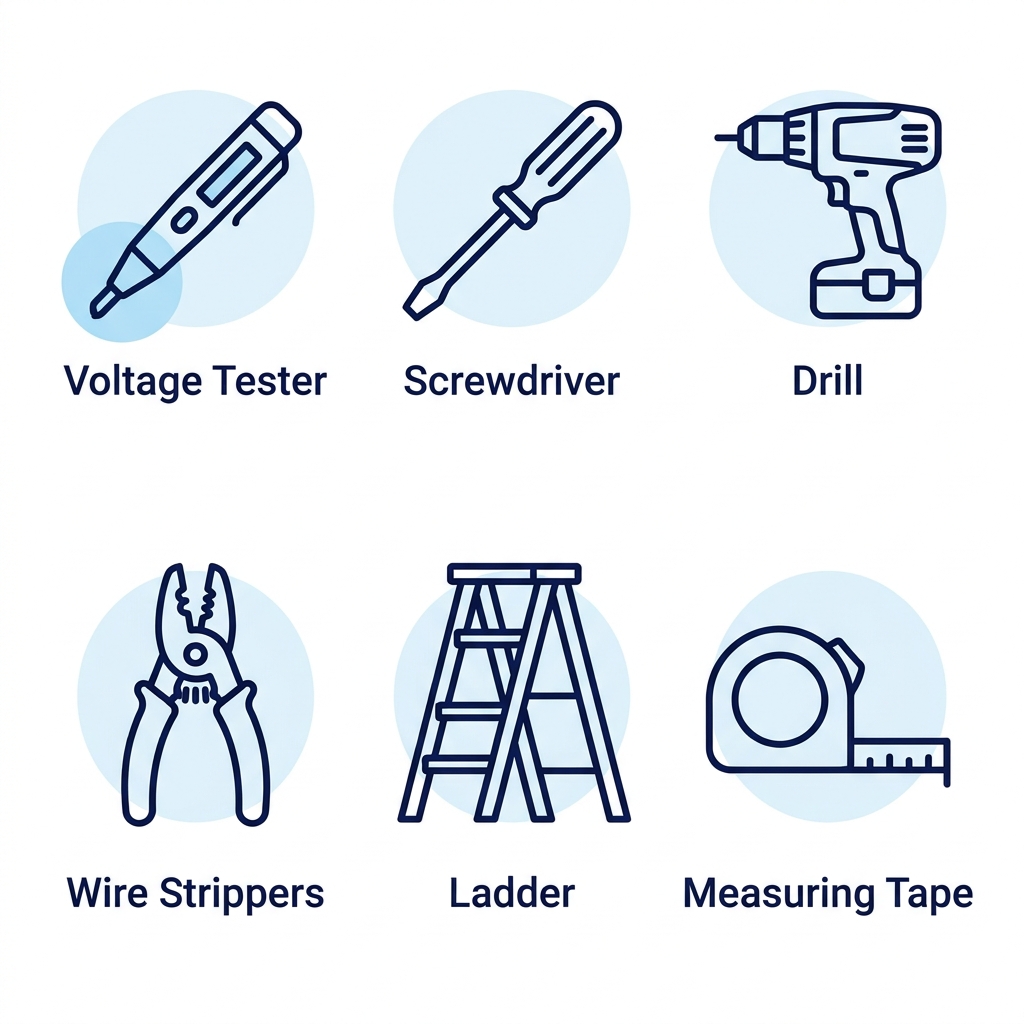
- Voltage tester to confirm circuits are off
- Screwdriver (flat-head and Phillips) for fixture and track mounting
- Drill with appropriate bits for ceiling materials
- Wire strippers to prepare conductors
- Ladder rated for ceiling height
- Measuring tape for precise layout planning
Before installation, ensure the track is permanently installed on a branch circuit that does not exceed the track’s rated capacity. All track fittings must be track-specific, maintain proper polarization, and preserve grounding conductor continuity throughout the system. Additionally, any track section 4 feet or shorter requires at least two supports to prevent sagging and ensure secure fastening.
Once all this has been taken care of, you can now draw up your track plans and proceed with confidence.
Step 1: Plan the Track Layout
Installing WAC track lighting in a Marina del Rey home begins with a carefully planned track layout. Homeowners should decide between a straight linear run for hallways or a curvable system to follow architectural features, prioritizing adjustability for future fixture repositioning.
Track placement must avoid wet, damp, or corrosive environments and concealed spaces, as prohibited by code. The planned track should sit at least 5 feet above the finished floor unless it is protected or operates at low voltage. Each track section 4 feet or shorter requires at least two supports for secure fastening and stable installation.
Before finalizing the layout, confirm the planned circuit does not exceed the track’s rated capacity to prevent overloading. Once the layout is settled, the space must be de-energized at the breaker before any hands-on work begins.
Step 2: Cut Power at the Breaker
Now that the track layout has been finalized, we’ll turn off the power. The next critical step is to de-energize the circuit to prevent electrical shock. Locate the breaker panel in your Marina del Rey home and identify the correct breaker controlling the track lighting circuit so we can de-energize the circuit to prevent electrical shock. Flip it to the ‘OFF’ position and mark the label on the breaker for easier flipping when you want the track back in operation. Make sure the breaker box labels are clear. If not or if you’re still unsure about the track light circuit breaker, don’t continue. Call a qualified electrician to tag the right circuit breaker.
Prior to working on your circuit wiring, make sure there’s no power going through by using either a non-contact voltage tester or a multimeter to check if the circuit is actually off. Check out the breaker switch as well as all the wire connections near the fixture that will be replaced and make sure that there isn’t any residual electricity left in those locations. Only once the tester displays zero volts may you safely begin mounting the ceiling adapter before continuing your work.
Step 3: Mount the Ceiling Adapter
Now that the power has been turned off at the electrical panel, the electrician should be able to install the ceiling adapter on the junction box located in a Marina del Rey house. Make sure the adapter plate is positioned so the track section lines up correctly and the mounting holes match the junction box’s studs or screws. Fasten the box using the correct hardware, either a self tapping screw for a metal box or toggle bolts for a dry wall anchor, making sure they’re all tightened evenly, otherwise the box will warp out of shape.
First make sure that the bracket holding up your fixture is firm and level, otherwise you’ll have trouble keeping the track aligned. Make certain that there has been no water damage to your ceiling before installing track lighting because it should not be installed if it’s wet or damp.
Now you should link your adapter’s ground connection to that junction box’s ground screw to preserve the grounding path. And now that everything has been checked, this adapter can hold on to its track section.
Step 4: Install the Track Section
When installing track lighting in Marina del Rey, position the track against the ceiling mount and press down until it locks in place. When this happens, pressure should be applied over its entire surface to prevent any shifting or rocking motion later on. Also, verify that the fittings are track-specific and that the connection maintains grounding continuity and correct polarization before moving forward.
Track sections 4 feet or shorter require at least two supports for secure fastening. If joining multiple track sections in a continuous run, add one additional support for each continuous row section. The track must not be installed in wet or damp locations, such as bathrooms, and cannot pass through walls. Confirm the track stays at least 5 feet above the finished floor unless it is protected or a low-voltage system. The track must be permanently installed on a branch circuit not exceeding its rated capacity.
Step 5: Connect the Wiring
For installing WAC track lighting in Marina del Rey homes, the wiring connection must be done carefully, paying attention to safety and code requirements. Turn off the circuit breaker and check that the wires have no current running through them with the aid of a noncontact voltage tester to prevent accidentally getting shocked while working.
Match the track feed type—such as a live-end feed—to the manufacturer’s wiring diagram, and then connect your hot, neutral, and ground wires to the corresponding terminals on the track or junction box, ensuring each supply conductor aligns with its designated terminal. Then tighten up any terminals to make sure they don’t come loose. Before turning the circuit back on, double-check that the ground wire was connected to a grounding point in the track or a grounding point inside the junction box. This helps maintain electrical safety when the circuit is restored.
The marine atmosphere in Marina del Rey demands corrosion resistant electrical connections that must be clean and secure since they must resist moisture from humidity as well as sea salt air.
Step 6: Join Track Sections and End Caps
Next, once everything is wired up, lay out the rail in straight lines, matching the conductor wires as closely together as you can at each joint. Join the rail segments using appropriate connectors from the same manufacturer that will ensure polarity and electrical continuity remain the same at all joints. This way your finished job will be both safe and complete.
Each track section 4 feet or shorter must be fastened with at least two supports so joined sections stay secure and do not sag under fixture weight. Confirm the joined run remains permanently installed on a branch circuit that does not exceed the track’s rated capacity; overloading risks overheating and noncompliance with code.
Make sure the joints line up cleanly, and that the run terminates with a proper end cap rather than an exposed end. For instance, in coastal installations such as Marina del Rey, use corrosion-resistant fixtures and connections to withstand salt air and moisture.
Step 7: Attach Fixtures and Test
Once you have all of your track pieces put together and installed with end caps, turn off the power at your circuit breaker before attaching any light fixtures. Most WAC fixture heads will screw in on to the track and when turned just a little bit will click into place, locking it in place and creating a solid connection for electricity to pass through.
Align each head so its contact posts engage the track’s internal conductors. Restore power at the breaker and switch on the track. Confirm every fixture illuminates; if a head fails to light, reseat it before assuming a fault. Installations in Los Angeles must comply with California Title 24 energy code requirements, and homeowners unsure about electrical work should consult a licensed electrician holding a valid C-10 classification from the CSLB. Verify any contractor’s license and insurance directly, as neither this guide nor any directory guarantees contractor workmanship.
If lights don’t turn on at all during testing, or if they flicker erratically, then the problem needs to be determined.
Troubleshooting Common Track Lighting Problems
Even if installed carefully, such as in the case of installing WAC track lighting, these problems may still occur. Homeowners may need help if there is flickering lights, buzzing sounds or dark spots on the ceiling. These symptoms often signal underlying electrical or installation concerns that require attention before they escalate.
Fluctuating lights or persistent buzzes may signal loose wires, overloaded circuit breakers, or worn-out hardware. If your track lights flicker frequently you need to check your tracks and fittings, looking for evidence of wear and tear. In wet or damp locations, NEC 410 prohibits track lighting. Improper placement—such as running track runs through walls—can create unsafe conditions that manifest as intermittent failures or persistent malfunctions.
Loose or undersupported track sections are another common culprit. NEC 410 specifies that track sections of 4 feet or less require two supports, with an additional support added for each continuous 4-foot section. Sagging or misaligned tracks disrupt electrical connections, leading to sections or individual heads failing to illuminate. Before inspecting any fixture or connection, always turn off power at the circuit breaker to ensure safety.
In cases when the issue turns out to be more serious—such as wiring damage, poor installation, or code violations—homeowners should hire a licensed electrician. In California, electricians must hold a valid C-10 classification, which homeowners can verify through the Contractors State License Board. Even though sometimes small fixes can be done on their own, other jobs require qualified professionals because they have the necessary knowledge about how things should be installed in accordance with local building codes.
Frequently Asked Questions
Do I need a licensed electrician to install WAC track lighting systems?
Yes, California requires a licensed C-10 electrical contractor to install track lighting. The contractor must verify compliance with Title 24 energy codes, perform load calculations, and obtain permits for the work. Homeowners must confirm the electrician’s license and insurance before hiring.
How do I determine if my ceiling can support the weight of WAC track lighting?
Track sections 4 feet or shorter require at least two supports for secure fastening. The track must be permanently installed on a branch circuit not exceeding its rated capacity. Verify ceiling structure and use appropriate anchors or mounting hardware for stability.
What are the common causes of flickering in newly installed WAC track lights?
Flickering may result from loose connections, improper polarization, or an overloaded circuit. Ensure all track fittings are track-specific and maintain grounding continuity. Verify the circuit does not exceed the track’s rated capacity and that fixtures are properly seated.
Can I mix WAC track lighting components with other brands or track systems?
No, WAC track lighting components must be track-specific to maintain proper polarization and grounding continuity. Mixing brands or systems risks electrical faults and voids compliance with installation standards.
Request a Quote for Professional Track Lighting Installation
Once you’ve identified your lighting needs and confirmed the scope of work, the next step is to request a quote tailored to a track lighting installation in a Marina del Rey home. Professional electricians typically provide quotes within 24 hours, giving you a clear picture of project costs and timelines. Standard room retrofits require 2 to 4 hours of labor, while permit processing can extend the schedule by one to two weeks due to Title 24 compliance and load calculations.
This is a free service that will connect you with independent local contractors who are licensed and insured. However, it is your responsibility to verify their credentials through the California Contractors State License Board before hiring. All individuals shown in photos and videos on this website are actors or models, not actual contractors. Copyright and trademark notices as displayed on this website.
Request Your Marina del Rey Quote
You have now walked through every stage of a track lighting installation, from planning the layout and cutting power to joining sections and testing the finished run. Along the way, the coastal realities of a home in Marina del Rey became clear: California Title 24 LED requirements, permits that can add one to two weeks, and marine-grade fixtures suited to salt air. A standard room retrofit typically takes just two to four hours of labor for a professional. Quotes are typically provided within 24 hours through the site’s free request flow, which connects homeowners with independent local contractors. Because every contractor operates independently, homeowners should verify licensing and insurance directly, such as a valid C-10 classification through the CSLB. To move forward, submit the quote request form or call (424) 365-8015 during business hours, Monday through Friday from 7:00 AM to 7:00 PM or Saturday from 8:00 AM to 5:00 PM.
Request Your Marina del Rey Quote